Getting started
Quickstart for admins
Add your domain, publish DNS records, create users and start sending with Mail by vizsu in a few minutes.
Mail by vizsu hosts email on a domain you already own, like acme.com. You keep your domain and your DNS provider; you only add a few records. This guide is for the person setting up the organization.
1. Add your domain
Sign in and open Domains. Enter the domain name (internationalised names are fine). Some domains can't be used: disposable-mail providers, lookalikes of well-known brands and vizsu's own domains are refused.
2. Publish the DNS records
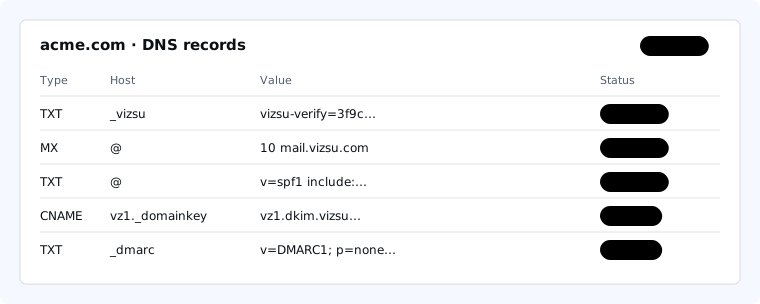
The domain page lists every record to add at your DNS provider, with copy buttons and a live status for each. The first record, a TXT at _vizsu.yourdomain, proves you own the domain. See Add and verify your domain and the DNS provider guides.
3. Verify
The dashboard re-checks your records each time you open the domain. As soon as the ownership record is visible the domain becomes verified. Mail starts flowing once the MX record is in place.
4. Create users
In Users, add an address on the verified domain. See Users, aliases and forwarding for how each person gets their sign-in.
5. Read and send mail
People sign in to webmail at https://mail.vizsu.com with their vizsu account, or set up an email app with an app password.